How to Add Uni Email to iPhone: A Step-by-Step Guide
Adding your university email to your iPhone is a straightforward process that can help you stay organized and connected. Whether you’re a student or a faculty member, having your university email readily accessible on your iPhone can be incredibly convenient. In this detailed guide, I’ll walk you through the process of adding your uni email to your iPhone, ensuring that you have all the information you need to set it up successfully.
Before You Begin
Before you start the process of adding your uni email to your iPhone, there are a few things you should know:
- Your university should provide you with the necessary email address and password.
- Make sure you have the correct email address format, as it may differ from a standard email format.
- Check if your university uses a specific email service, such as Google Workspace or Microsoft 365, as this will affect the setup process.
Once you have this information, you can proceed with the following steps.
Step 1: Open the Settings App
Locate the Settings app on your iPhone’s home screen and tap on it to open.
Step 2: Navigate to Mail
Scroll down and tap on “Mail,” which is typically found under the “Accounts & Passwords” section.
Step 3: Tap on “Add Account”
At the top of the Mail screen, you’ll see an option to “Add Account.” Tap on it to begin the process of adding your uni email.
Step 4: Choose Your Email Provider
Select the email provider that corresponds to your university’s email service. For example, if your university uses Google Workspace, choose “Google.” If it uses Microsoft 365, choose “Outlook.com” or “Exchange.” If your university uses a different email service, select “Other” and proceed to the next step.
Step 5: Enter Your Email Address and Password
Enter your university email address and password in the provided fields. Make sure to double-check the email address and password for accuracy.
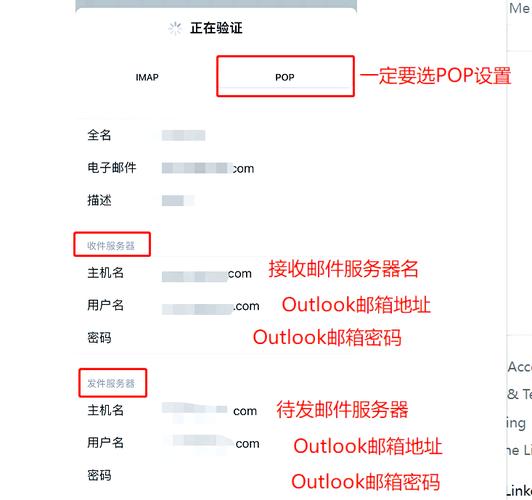
Step 6: Configure Advanced Settings (If Necessary)
Some email services may require additional configuration. If you see an option to “Advanced,” tap on it and enter the following information:
| Setting | Value |
|---|---|
| Server | imap.example.com |
| Port | 993 |
| Use SSL | On |
| Username | your_email@example.com |
| Password | your_password |
Replace “imap.example.com” with your university’s IMAP server address and “your_email@example.com” with your actual email address. If you’re unsure about these settings, contact your university’s IT department for assistance.
Step 7: Save Your Account
Once you’ve entered all the necessary information, tap “Next” or “Save” to add your uni email to your iPhone.
Step 8: Confirm Your Account
In some cases, you may need to verify your account by entering a verification code sent to your email address. Open your university email on your computer or another device, find the verification email, and enter the code in the provided field on your iPhone.
Step 9: Access Your Uni Email
After your account has been successfully added, you can access your uni email by opening the Mail app on your iPhone. You should see your university email account listed under “Accounts.” Tap on it to view your inbox and start receiving and sending emails.
By following these steps, you should now have your uni email successfully added to your iPhone. If you encounter any issues during the process, don’t hesitate to contact your university’s IT department for assistance.